


10 Best Ways to Clear Windows Defender Protection History on Windows 11

Windows 11 is the latest version of the Windows operating system, offering users a more secure and robust experience than ever before. However, as with all new operating systems, there are some challenges that users must face when it comes to clearing the Windows Defender Protection History.
Windows Defender is an anti-malware solution that is included in Windows 11. It is designed to protect your system from malware, spyware, and other malicious threats. While it is a great tool, it can also cause some problems when it comes to clearing the Windows Defender Protection History.

The Windows Defender Protection History is a log of all the activities that Windows Defender has taken to protect your system. This includes scans, updates, and other important information. As time passes, the size of this log can grow large, which can lead to slowdowns and other issues. Fortunately, there are a few ways that you can clear the Windows Defender Protection History to make sure that your system is running optimally.
Here are the 10 best ways to clear the Windows Defender Protection History on Windows 11:
1. Use the Windows Defender App: The Windows Defender app is the easiest way to clear the Windows Defender Protection History. You can find the app in the Windows Store. Once you open it, you will be able to view the Protection History log and then clear it with a single click.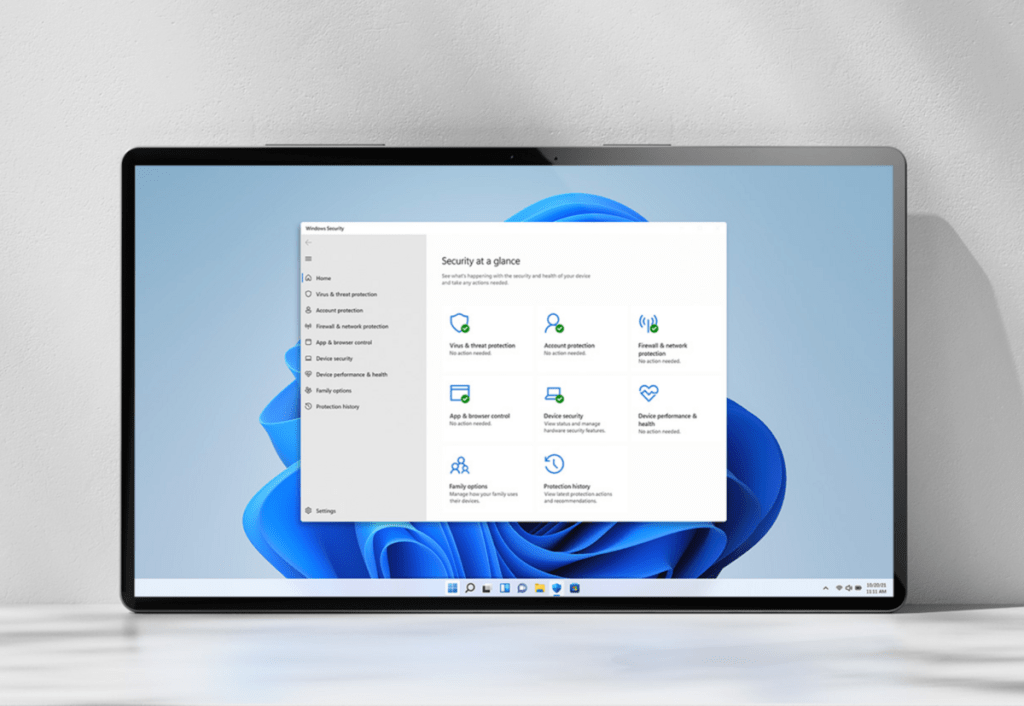
2. Use the Command Line: You can also clear the Protection History log by using the command line. First, open the Command Prompt and then type “wevtutil cl Security” and press Enter. This will clear the Windows Defender Protection History for all events in the log.
3. Use the Windows Registry: The Windows Registry is a powerful tool that allows you to make changes to the settings of your system. You can use it to clear the Windows Defender Protection History by navigating to the following key:
HKEY_LOCAL_MACHINE\SOFTWARE\Microsoft\Windows Defender\Scans
Once you are there, delete the “History” folder. This will clear the Windows Defender Protection History.

4. Use the Windows Defender Advanced Scan Tool: The Windows Defender Advanced Scan Tool is a powerful tool that allows you to scan and clean your system. It includes an option to clear the Windows Defender Protection History, which you can access by going to the “History” tab.
5. Use the Cleanup Tool: The Windows Defender Cleanup Tool is another powerful tool that can help you clear the Windows Defender Protection History. It is included in the Windows Defender app and can be accessed by going to the “Tools” tab.
6. Use Windows PowerShell: Windows PowerShell is a powerful scripting language that can be used to automate tasks. You can use it to clear the Windows Defender Protection History by typing the following command:
Clear-WDPH
7. Use the Microsoft Safety Scanner: The Microsoft Safety Scanner is a free tool that scans and cleans your system for any malicious threats. It also includes an option to clear the Windows Defender Protection History.

8. Use the Windows Defender Offline Scan Tool: The Windows Defender Offline Scan Tool is a tool that can scan and clean your system even when it is not connected to the Internet. It includes an option to clear the Windows Defender Protection History.
9. Use the Windows Update: Windows Update is a feature that can be used to keep your system up to date with the latest security updates. It also includes an option to clear it.
10. Use a Third-Party Tool: There are many third-party tools available that can help you clear the Windows Defender Protection History. They are usually safer than using the Windows Registry, but be sure to research the tool before you use it.

By following these steps, you should be able to easily clear the Windows Defender Protection History on Windows 11. This will help ensure your system is running optimally and that you are protected from any malicious threats. Good luck!


![[11.11 Offer]Buy Windows 11 key & Office 2021 key](https://affordablekey.com/wp-content/uploads/2023/11/Affordablekey-91.jpg)