


Upgrading to Windows 11 Pro from Windows 11 Home
Upgrading to Windows 11 Pro the latest iteration of Microsoft’s popular operating system brings a host of new features and enhancements designed to improve productivity, performance, and user experience. While Windows 11 Home is suitable for most users, some might find the additional features of Windows 11 Pro better suited to their needs. Fortunately, upgrading from Windows 11 Home to Windows 11 Pro is a relatively straightforward process that doesn’t require a complete reinstallation of the operating system. In this guide, we’ll walk you through the steps to upgrade seamlessly.
Upgrading to Windows 11 Pro from Windows 11 Home: A Comprehensive Guide
Step 1: Check Eligibility and Edition:
Before proceeding with the upgrade, it’s essential to confirm that your PC is eligible for Windows 11 and that you’re running Windows 11 Home. To check your current edition, go to Settings > System > About. Make sure your system meets the hardware requirements for Windows 11 as outlined by Microsoft.
Step 2: Access Windows 11 Pro Features:
Windows 11 Pro offers enhanced features like Group Policy Management, Remote Desktop, BitLocker encryption, and domain join capabilities. Consider the benefits these features offer and how they align with your requirements before deciding to upgrade.
Step 3: Purchase a Windows 11 Pro Product Key:
To upgrade from Windows 11 Home to Windows 11 Pro, you’ll need a valid Windows 11 Pro product key. You can purchase a product key from the Microsoft Store or authorized retailers.
Step 4: Begin the Upgrade Process:
Open Settings: Click on the “Start” button and select “Settings” (the gear icon).
Go to Activation: In the Settings window, click on “System” and then choose “Activation” from the left-hand menu.
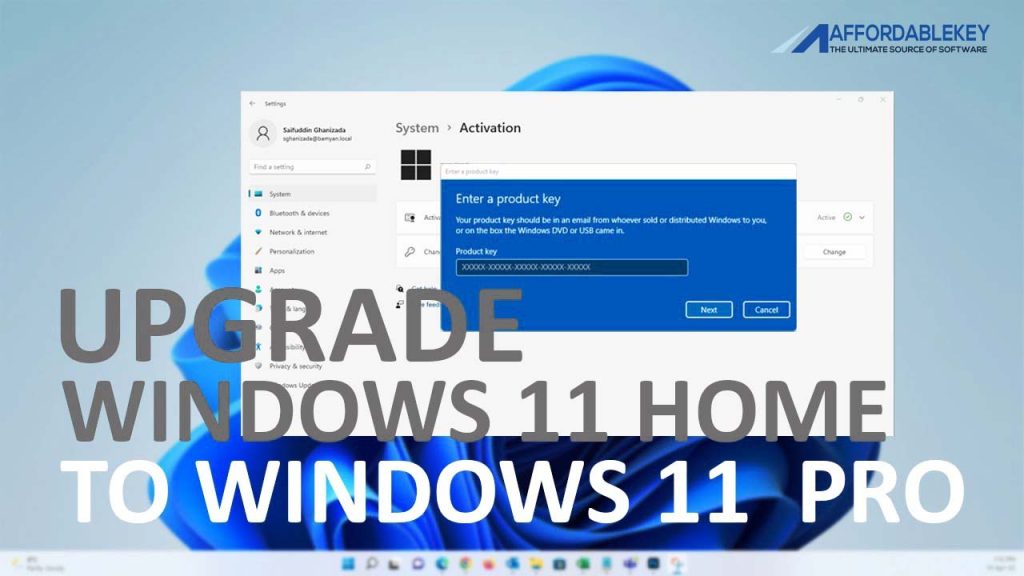
Change Product Key: Under Activation, click on the “Change product key” option. A new window will open.
Enter the Product Key: Enter the Windows 11 Pro product key you’ve purchased. Ensure accuracy to avoid activation issues.
Activate: Click on the “Next” button and follow the prompts to complete the activation process.
Reboot Your PC: After activation, you may be prompted to restart your PC. Save your work and restart the computer to apply the changes.
Step 5: Verify Upgrade:
Once your PC restarts, go back to Settings > System > About. You should see that your Windows edition has been updated to Windows 11 Pro.
Step 6: Explore Upgrading to Windows 11 Pro Features:
With the upgrade complete, take some time to explore the additional features offered by Windows 11 Pro. Familiarize yourself with Group Policy settings, BitLocker encryption, Remote Desktop functionality, and any other features that align with your needs.
Conclusion:
Upgrading from Windows 11 Home to Windows 11 Pro can be done without reinstalling the operating system. By following the steps outlined in this guide, you can unlock additional features and capabilities that Upgrading to Windows 11 Pro offers. Remember to ensure your PC meets the hardware requirements for Windows 11, purchase a valid product key, and follow the activation process accurately. With the upgraded features of Windows 11 Pro at your fingertips, you’ll be well-equipped to enhance your productivity and experience with the operating system.